Friday, November 25, 2011

Pallas Athena free-hand machine embroidery or why I don't like tear away interfacing

I'm a dork.  A nerd. And that's OK.  I tell you this because for some reason I think it's dorky nerdy that I decided to put an image of Athena under the poetic raven I did.  Why? If you know the poem then you know the raven came in Poe's chamber and rest upon a bust of Pallas (aka Athena).  I decided to put her on the shirt via machine embroidery since I already had the foot.

This is what a machine embroidery foot looks like. They should cost you about $11 bucks if you don't have one.
I was going to try and do this image, but I couldn't get it to translate to embroidery...
Then I found something that would work better...

I traced the image onto that tear away interfacing I used in the sparrows.  I put it on top of the t-shirt since I didn't want to do the image and have the actual stitching that showed be the understitching.  I pinned the interfacing to the shirt since I couldn't get my embroidery hoop to cooperate with my sewing machine.  I sat down, took a deep breath, and began. Ugh.
I started it trying to stay closest to the lines as possible. I wanted it to be all proper. I learned sometimes you have to throw proper out the damn window and go with the flow. Here's what happened...

You can see where I tried to draw the other Athena. I used tailor's chalk so it came out in the wash. I trimmed the interfacing close to the stitching to make it easier to tear away.
This was all done in a continuous stitch...
Athena's gorgon shield
All in all I like how it came out. Then I tore away the interfacing.  Make sure you have muscles and patience for this crap. It cause a lot of the stitches to loosen and get all wonky. I tried wetting it to see if it would be easier. Not no, but hell no. It's like a product of Poseidon, the water made it stronger, the rat bastard. Even putting it through the washer and dryer didn't work. Poop.
My advice is if you use this stuff, make sure you only use it on the backside of what you are working on. NEVER put it to the front. Pain in the ass!

Tuesday, November 22, 2011

Embroidered Tattoo-inspired Sparrows (how-to? perhaps...)

I knew I wanted to put some sparrows on the t-shirt, but where? What method would I use? Hmm...
Taking a page from traditional tattoos I decided to put the birds on the shoulder area.  I knew I didn't want to paint them on, and wasn't ready to attempt the Beads in a Bottle crap again. OH! Embroidery! I've never done that before and this is all about practicing, right?!? Well hell. Here I go...
If you want to try embroidering something, here's what you'll need:

embroidery floss
needle
embroidery hoop
interfacing (iron-on or tear away or water soluble)
disappearing ink fabric pen or pattern transfer paper
design of some kind

*Sorry I didn't take pictures of the process, but there are several online tutorials on this stuff (I decided to blog about the t shirt after I already started all of this, so I don't know if I want to go the how-to route or the just telling you what I did like the skull a day guy)...just remember if I don't explain something well enough Google and the Library are your friends!* And back to your regularly scheduled blog!

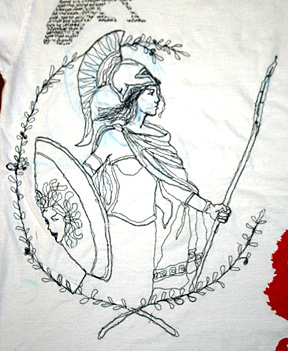
This is the picture I found. I resized them printed the bad boys out.
I also reversed the image so the white lines were black and easier to see under the t shirt.  Then for some bizarro reason I tried pattern transfer paper. It worked, but not really. So I went back over the image with one of those purple air soluble disappearing ink pens. If you use a regular pen, make sure you embroider over the image to cover it, or use the ancient Chinese secret to getting rid of ink. If you know what it is, please tell me. No, seriously, tell me.

Now the image was on there and I had my floss colors all picked out it was time to start this rodeo...
Make sure you have enough interfacing so it's bigger than the hoop. The interfacing helps to keep the fabric from stretching whilst in the hoop.  For the blue bird I used iron on, but I didn't iron it on.

I used a simple back stitch since I was used to it from my cross-stitching youth. 
I used tear-away interfacing for the green bird. Honestly I don't know how I feel about this stuff. It's nice and stiff (what girl doesn't like something stiff?) but it's a pain to tear away. So if you use it, make sure you use towards the back of the t-shirt.  You'll see why I say this in the Athena post.
For the eyeballs I used black Beads in a Bottle paint instead of a french knot. Just make sure you don't iron over the paint like my genius self did.

Sunday, November 20, 2011

Appliqué cover up

I took a little break from "The Raven" theme since I knew how I wanted to do Athena was gonna be a bit of a doozy.

I wanted to put the two wrist tattoos I have on the shirt somehow. One is 'know thyself' in Greek and the other is a Leo symbol. Well, painting them was a hot fucking mess. I tried to clean up the crap paint job I did and it just made it worse.
I know it's a practice t shirt where it's OK to fuck up, but I was not even close to OK with what I did. How to fix this? I figured on two quick and dirty appliqué techniques.

The red skull fabric was where I attempted the Leo symbol. So to fix it I sewed the fabric on the backside on if the sleeve and then cut away on the inside if the stitching so the red fabric would be exposed.
On the part where I did the squares was where I attempted the Greek part. On that one I just cut out little squares, of skull fabric of course, and overlapped them over where I wanted to cover. You can either roll under a hem on each square or leave them raw like I did.  You can see some of the paint where I boo boo'ed in blue.

So if you have a spot on your shirt that won't come out, try these two easy techniques!

Monday, November 14, 2011

Edgar Allen Poe painted stencil how-to (sort of how-to lol)

Continuing with the Raven theme I decided to do Mr. Poe himself. But how? Since I'm not that great at drawing I scoured the internet and came across this beauty.

by iamwickedstupid
I cut out the stencil on posterboard (since I had it laying around) with an X-Acto knife starting at his eyes. While cutting it I made sure I had a self-healing mat so I don't cut through anything I didn't want to. If you don't have a self-healing mat then a thick piece of corrugated cardboard will suffice (you can get it for free from the grocery store!). Make sure you turn the piece as you need it.   Here's the stencil...
The only point of caution is to watch out for thin spots, especially if you use paper-y type stuff for the stencil.

You can reinforce the thin spots with tape.
 Just make sure you slide the stencil around horizontally and don't hold it vertically if you have thin spots in your stencil as it will cause it to tear.

Now that I had it all positioned and taped in place I whipped out my fabric paint and fabric brush (don't use brushes for regualr art as they are too weak. Fabric brushes are stiff and deliver the paint to the fabric a lot better. (If you don't have a fabric brush, then you can use a sponge brush, or even a make-up sponge.) I used Polymark Bright Red Shiny dimensional fabric paint.  I started dobbing the paint around the edges of the stencil.

Once you have the paint down around the edges of the stencil you can lift it off the fabric.

And fill in the rest. If you think you're too sloppy then you can leave the stencil on, but make sure you lift it off as soon as you're done!
Finished product!

Quoth the Raven...(Poetic stencil how-to)

I was having a time deciding what the heck to do next.  I came around to my favorite poem, "The Raven." But how can I apply that to a t-shirt? Something came to me about words in a stencil. Alas another use for the fabulous Tee Juice fine line pen!
I found a basic outline of a raven and printed it out on regular paper. I cut out the raven shape and decided where to put it. I decided on back left upper shoulder area with the bird facing towards the center of my body. I copied the part of the poem where the raven shows up making sure I overlapped the edges of the stencil like so.
I made sure I continued the wording even through the legs so it didn't look like I jumped around.
And here's what it looked like after I lifted the stencil...

Since I overlapped the edges it kept the shape of the stencil better than just starting at the edge.

close up
So if you have a favorite poem, why not copy it onto your own t-shirt?

Sunday, November 13, 2011

Beads in a bottle?

I know what you're saying. "Another effing skull?" Yeah, I like skulls so there will probably be a few on here.

Next I tried this stuff called Beads in a Bottle by Tulip. I went crazy one day cause they were on clearance at Michael's. What it is is paint that rounds by itself to make it look like a bead instead of pointy Madonna boobs. Well it doesn't quite look like a bead, it looks like little dobs of paint. And it takes practice. So here's how it came out...
I used the pewter color, but as you can tell all of the "beads" are not the same size. And some of them ran together and some came out wonky. If you do try this stuff all I can say is practice with it. A lot.

Thursday, November 10, 2011

Birds on a Sleeve

OK. So I started this thing, I better continue with it.

I was looking up raven images since I heart Edgar Allen Poe's narrative poem, "The Raven" (you'll be seeing more raven inspired stuff later) and came across this one...
I liked the image of the birds on the tree and knew it was something I could replicate somewhat easily.  Now where the heck to put this thing.  Sleeve was the first thing that popped into my head. Or perhaps it was just because I put the skull iron-on the other sleeve the day before...maybe...
I took the print out and slid it under the sleeve, making sure the birds faced forward.  I remember from somewhere about tattoos and imagery displayed on the body should face forward if on the side or towards the center if on the front or back. And so I digress...
Anywho, the next question was what the heck to put this on the shirt with. Oh I know! My Tee Juice pen! Basically it's a fine tipped felt tip style pen that's easy to draw with on fabric and then heat set with an iron once everything is dry. (My only caution is to test it on some scrap fabric first because it just takes a light touch for the pen to work. If you hold it in one spot for too long the ink will run throughout the fibers making a big blob of ink.)
I slid the original image under the sleeve and traced.  If you have a hard time seeing the image you can use a lightbox or tape the image and tshirt up to a sunny window. I was mainly interested in getting the birds traced and the main branches. The rest I kinda improvised.  Anywho, here's the end result....

I think I'll do this on another shirt I like it so much! Woo hoo!